
There’s just something about homemade bread.
It’s softer. Fresher. And once you start making it yourself, it’s really hard to go back to store-bought.
If you’ve ever felt intimidated by baking bread—don’t be. These recipes are simple, beginner-friendly, and designed for real life (not a perfect kitchen).
Today I’m sharing my go-to bread basics:
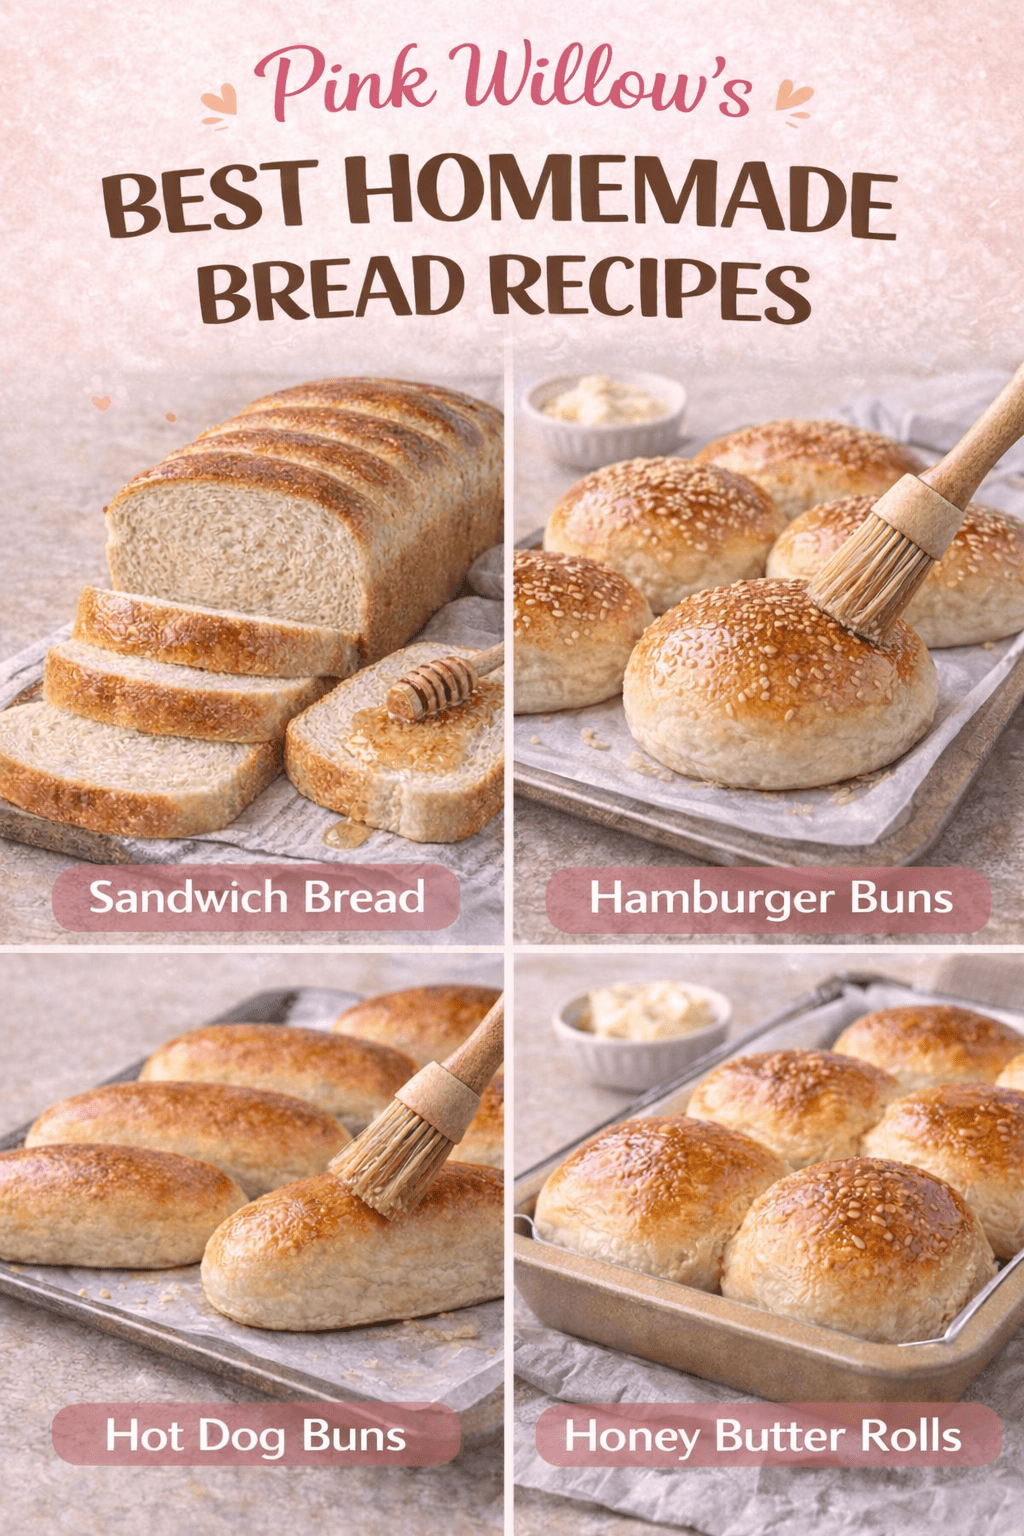
✨ Sandwich Bread
✨ Hamburger Buns
✨ Hot Dog Buns
✨ Honey Butter Rolls
Everything you need to level up your kitchen and start baking from scratch.
🍯 Why I Love Baking Bread at Home
- No preservatives or unnecessary ingredients
- More affordable than buying bakery bread
- Tastes so much better
- Makes your home feel cozy and put together
And once you get the hang of it, it becomes part of your weekly routine.
Homemade Sandwich Bread
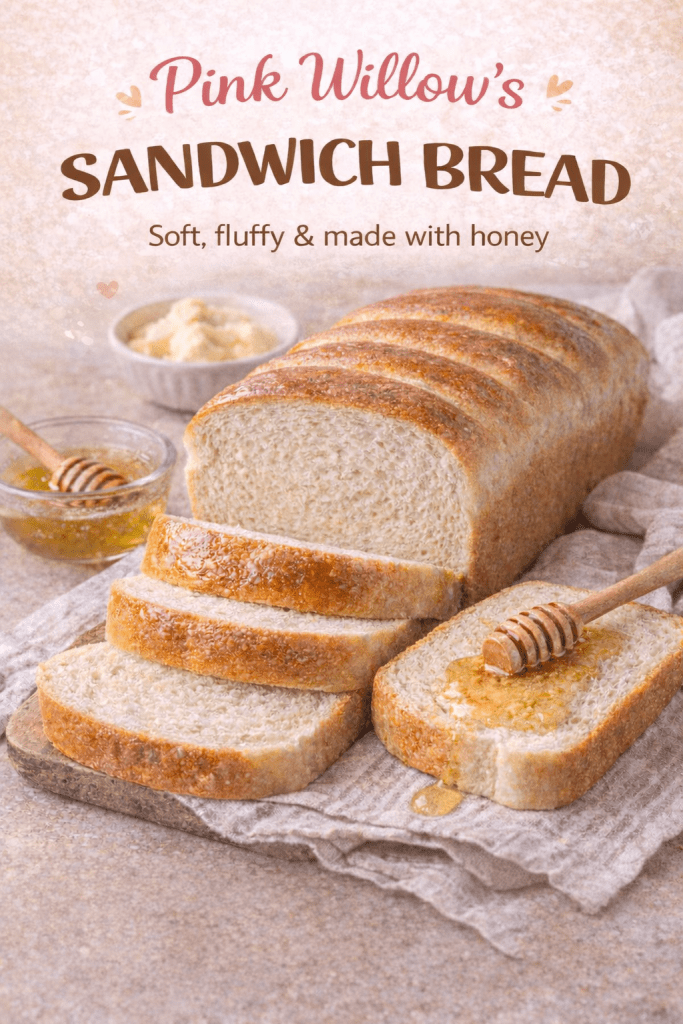
This is my everyday go-to bread. It’s soft, slightly sweet, and perfect for:
- Sandwiches
- Toast
- French toast
Why you’ll love it:
✔ Made with honey instead of sugar
✔ Stays soft for days
✔ Beginner-friendly
Ingredients:
- 1 cup warm milk (about 110°F)
- 2 ¼ tsp (1 packet) active dry yeast
- 2 tbsp sugar (or honey for a softer, slightly sweeter bun)
- 3 tbsp butter (softened or melted)
- 1 egg
- 3 to 3 ½ cups all-purpose flour
- 1 tsp salt
🥣 Instructions
1. Activate the Yeast
- In a large bowl, mix warm milk, yeast, and sugar (or honey)
- Let sit for 5–10 minutes until foamy
2. Make the Dough
- Add butter, egg, and salt
- Slowly mix in flour (start with 3 cups)
- Mix until a soft dough forms
👉 Add more flour if sticky (1 tbsp at a time)
3. Knead
- Knead for 8–10 minutes
- Dough should be smooth and slightly elastic
4. First Rise
- Place in a greased bowl
- Cover and let rise for 1 hour or until doubled
5. Shape the Buns
- Punch down the dough
- Divide into 8 equal pieces
- Roll into balls and gently flatten into bun shape
- Place on a lined baking sheet
6. Second Rise
- Cover and let rise for 30–45 minutes
- Buns should puff up nicely
7. Optional Topping
- Brush with egg wash (1 egg + 1 tbsp water)
- Add sesame seeds if desired
8. Bake
- Preheat oven to 375°F
- Bake for 15–18 minutes
- Until golden brown
9. Finish
- Brush tops with melted butter for a soft finish
- Let cool before slicing
Tips for Perfect Buns
Store in an airtight bag for up to 3 days or freezecipe here]
Don’t skip flattening slightly before the second rise (helps shape)
For extra softness: use bread flour instead of all-purpose
Want brioche-style? Add 1 extra egg + 1 tbsp honey
Homemade Hamburger Buns
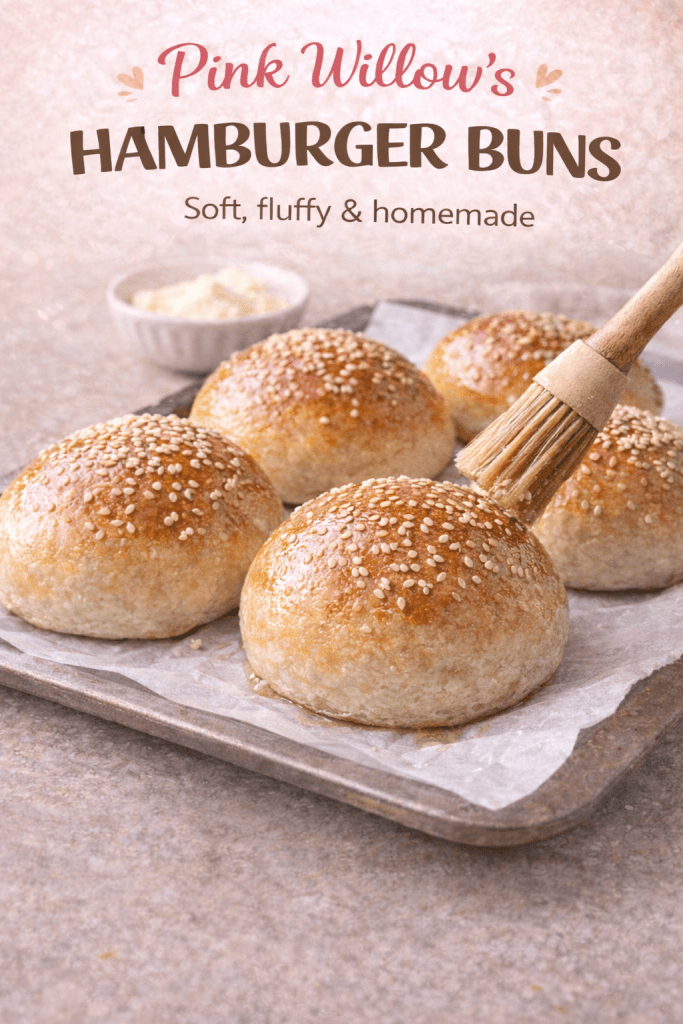
Once you make your own burger buns, you won’t go back.
They’re soft but sturdy—so they hold up to juicy burgers without falling apart.
Perfect for:
- Family dinners
- BBQ nights
- Meal prep
Ingredients:
- 1 cup warm milk (about 110°F)
- 2 ¼ tsp (1 packet) active dry yeast
- 2 tbsp sugar (or honey for a softer, slightly sweeter bun)
- 3 tbsp butter (softened or melted)
- 1 egg
- 3 to 3 ½ cups all-purpose flour
- 1 tsp salt
🥣 Instructions
1. Activate the Yeast
- In a large bowl, mix warm milk, yeast, and sugar (or honey)
- Let sit for 5–10 minutes until foamy
2. Make the Dough
- Add butter, egg, and salt
- Slowly mix in flour (start with 3 cups)
- Mix until a soft dough forms
👉 Add more flour if sticky (1 tbsp at a time)
3. Knead
- Knead for 8–10 minutes
- Dough should be smooth and slightly elastic
4. First Rise
- Place in a greased bowl
- Cover and let rise for 1 hour or until doubled
5. Shape the Buns
- Punch down the dough
- Divide into 8 equal pieces
- Roll into balls and gently flatten into bun shape
- Place on a lined baking sheet
6. Second Rise
- Cover and let rise for 30–45 minutes
- Buns should puff up nicely
7. Optional Topping
- Brush with egg wash (1 egg + 1 tbsp water)
- Add sesame seeds if desired
8. Bake
- Preheat oven to 375°F
- Bake for 15–18 minutes
- Until golden brown
9. Finish
- Brush tops with melted butter for a soft finish
- Let cool before slicing
Tips for Perfect Buns
Store in an airtight bag for up to 3 days or freezeun recipe here]
Don’t skip flattening slightly before the second rise (helps shape)
For extra softness: use bread flour instead of all-purpose
Want brioche-style? Add 1 extra egg + 1 tbsp honey
Homemade Hot Dog Buns
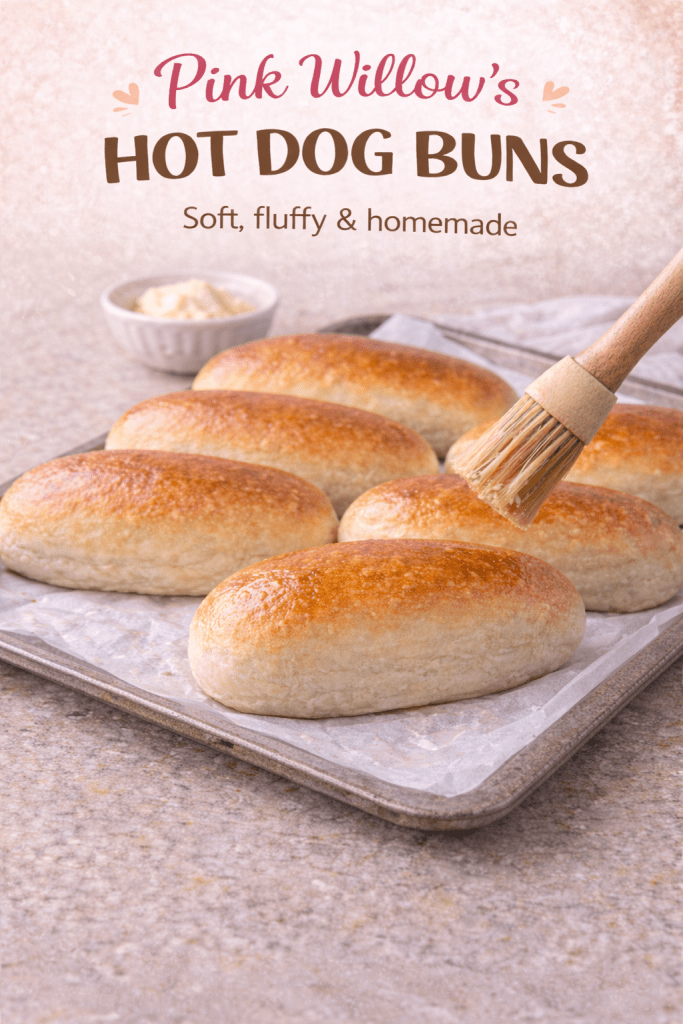
These are light, fluffy, and way better than anything from the store.
Why they’re a must:
✔ Soft texture
✔ Easy to shape
✔ Freezer-friendly
Ingredients:
- 1 cup warm milk (about 110°F)
- 2 ¼ tsp (1 packet) active dry yeast
- 2 tbsp honey (or sugar)
- 3 tbsp butter (softened or melted)
- 1 egg
- 3 to 3 ½ cups all-purpose flour
- 1 tsp salt
🥣 Instructions
1. Activate the Yeast
- In a large bowl, mix warm milk, yeast, and honey
- Let sit for 5–10 minutes until foamy
2. Make the Dough
- Add butter, egg, and salt
- Slowly mix in flour (start with 3 cups)
- Mix until a soft dough forms
👉 Add more flour if sticky (1 tbsp at a time)
3. Knead
- Knead for 8–10 minutes
- Dough should be smooth and slightly elastic
4. First Rise
- Place in a greased bowl
- Cover and let rise for 1 hour or until doubled
5. Shape the Buns
- Punch down the dough
- Divide into 8 equal pieces
For hot dog shape:
- Roll each piece into a 6–7 inch log
- Slightly flatten
- Place on a lined baking sheet (leave space between)
6. Second Rise
- Cover and let rise for 30–45 minutes
- Buns should puff up nicely
7. Optional Topping
- Brush with egg wash (1 egg + 1 tbsp water)
- (Optional) sprinkle sesame seeds or leave plain
8. Bake
- Preheat oven to 375°F
- Bake for 15–18 minutes
- Until golden brown
9. Finish
- Brush tops with melted butter for a soft finish
- Let cool before slicing
Tips for Perfect Hot Dog Buns
Store in an airtight bag for 3 days or freezen recipe here]
Roll evenly so buns bake uniformly
Don’t skip flattening slightly → helps shape
For extra softness: use bread flour instead of all-purpose
Honey Butter Rolls
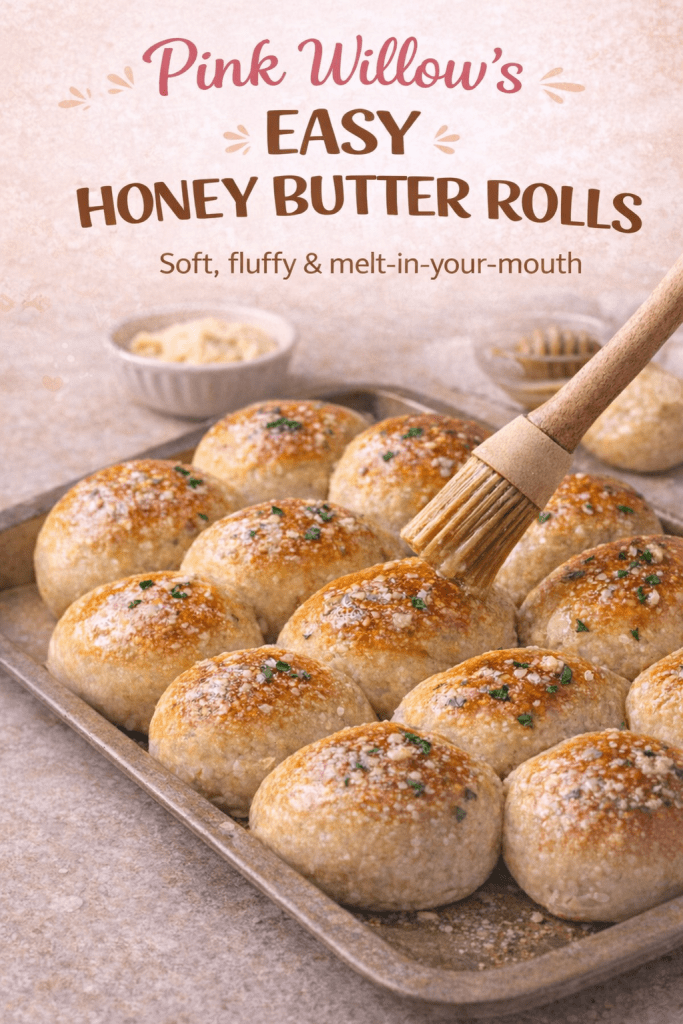
These are the softest, fluffiest rolls with just the right touch of sweetness.
Perfect for:
- Holiday dinners
- Weeknight meals
- Or honestly… just eating warm with butter
What makes them special:
✔ Slightly sweet dough
✔ Fluffy, pull-apart texture
✔ Optional honey butter glaze (so good)
Soft, fluffy, slightly sweet rolls with an optional honey butter glaze on top—these are PERFECT for dinners, holidays, or just because.
Ingredients:
Dough
- 1 cup warm milk
- 1 package instant yeast
- 4 tbsp sugar
- 1 egg
- 3 tbsp butter (room temperature)
- 3 cups flour
- ½ tbsp salt
- 1 tbsp honey
🍯 Optional Honey Butter Glaze
- 1 tbsp honey
- 1 tbsp butter (room temperature)
🥣 Instructions
1. Activate the Yeast
In a large bowl:
- Add warm milk, yeast, and sugar
- Stir lightly
- Let sit for 5 minutes until slightly foamy
2. Make the Dough
Add to the bowl:
- Egg (mix well)
- Butter
- Flour
- Salt
- Honey
Mix everything together for about 6 minutes until a soft dough forms.
3. First Rise
- Cover the bowl
- Let the dough sit for 1 hour until it rises
4. Shape the Rolls
- Lightly flour your surface
- Work the dough (“punch it down” / knead lightly)
- Let it rest for 30 minutes
- Roll and shape into balls
5. Second Rise
- Place rolls on a baking sheet
- Let them sit for at least 30 minutes
While they rest:
- Preheat oven to 350°F
6. Bake
- Bake for 25–30 minutes
- Until golden brown
7. Add Honey Butter (Optional but SO good)
Mix:
- 1 tbsp honey
- 1 tbsp butter
Spread over warm rolls right after baking.
Tips (so they turn out perfect)
Don’t skip rise times → that’s what makes them fluffylls recipe here]
Milk should be warm, not hot (hot will kill yeast)
Dough should be soft, not sticky—add a little flour if needed
Helpful Kitchen Tools (Makes This SO Much Easier)
You don’t need a ton of tools—but having the right ones will save you time and make your bread turn out even better.
Here are my go-to favorites 👇
🥣 Stand Mixer (Game Changer)
If you plan to make bread regularly, this is 100% worth it. It saves time and gives you perfectly kneaded dough every time.
🍞 Loaf Pan
For that perfect sandwich bread shape.
🧴 Dough Scraper
Makes dividing dough quick and easy (and less messy).
🧁 Baking Sheets
Perfect for buns and rolls.
Tips for Perfect Bread Every Time
- Make sure your milk is warm—not hot (hot kills yeast)
- Let your dough fully rise (this is what makes it fluffy)
- Add flour slowly if dough is sticky
- Don’t rush the process—bread takes a little patience
Final Thoughts
This isn’t about being perfect.
It’s about creating a home that feels warm, simple, and intentional.
Start with one recipe this week—and build from there.
Before you know it, homemade bread will just be part of what you do 🤍
📌 Save This for Later
If you’re not baking today, save this post so you can come back when you’re ready.
This post may contain affiliate links, which means I may earn a small commission if you purchase through my links—at no extra cost to you.

Leave a comment